Finding The Best Free Ways To Reach Your Remote IoT Raspberry Pi Behind A Router
Ever wanted to check on your smart garden or maybe control a home automation gadget while you're away? It's a common wish for anyone playing with a Raspberry Pi and IoT devices, that's for sure. The trick, though, often comes when your little computer is sitting comfortably behind your home router, tucked away from the wider internet. Getting to it without paying for a service or messing with tricky network settings can feel like a real puzzle.
Many folks, like you, are looking for the best possible ways to connect with their Raspberry Pi projects from anywhere, and they want to do it without spending a dime. It's a bit like wanting the best slice of chocolate cake without having to bake it yourself, you know? There are plenty of methods out there, some simple, some a bit more involved, but the goal is always to find that sweet spot of ease, security, and zero cost.
This guide will walk you through some really good free methods for accessing your remote IoT Raspberry Pi, even when it's behind a router. We'll talk about how these options work, what makes them special, and how you can pick the one that feels just right for your own setup. So, let's look at how to make your Pi truly accessible.
Table of Contents
- The Remote Access Challenge for Your Pi
- Top Free Ways to Reach Your Raspberry Pi Remotely
- Picking the Best Fit for Your Project
- Keeping Your Remote Pi Safe and Sound
- FAQ
The Remote Access Challenge for Your Pi
Getting to your Raspberry Pi from outside your home network, especially for IoT tasks, can feel a bit like trying to talk to someone through a closed door. Your home router acts as a gatekeeper, keeping everything inside your network safe from the wider internet. This is good for security, but it makes remote access a bit tricky, you know?
Why "Behind the Router" is a Hurdle
When your Raspberry Pi is "behind the router," it means it has a private address that only makes sense within your home network. The internet, on the other hand, sees your router's public address. So, if you try to connect directly to your Pi from afar, the internet doesn't quite know where to send your request. It's a bit like sending a letter to an apartment building without specifying the apartment number, and the mail carrier just sees the building address, so they don't know which resident it's for, you see.
This setup, called Network Address Translation (NAT), is a standard security measure. It helps protect your devices from unwanted visitors. However, for remote control of your IoT gadgets, it means you need a clever way to punch through that barrier without opening up your entire home network to the world, which would be a bad idea, naturally.
The Quest for Free Solutions
Many solutions exist for remote access, but a lot of them come with a monthly fee or require a good deal of technical know-how to set up. For the hobbyist or someone just wanting to check on a few sensors, paying for a service might not be the best choice. This is why finding truly free and dependable methods is so appealing. It's about getting the most out of your setup without breaking the bank, more or less.
The good news is that there are several excellent free options available. These methods let you create a secure path to your Pi, allowing you to monitor or control your IoT projects from anywhere with an internet connection. We're looking for solutions that are not just free, but also relatively simple to get going, and that's a big plus.
Top Free Ways to Reach Your Raspberry Pi Remotely
Let's explore some of the best free ways to get to your Raspberry Pi from outside your home. Each method has its own strengths, so you can pick what works best for your specific needs, like your particular project, that is.
VPNs: Your Private Tunnel (with free options)
A Virtual Private Network (VPN) creates a secure, encrypted connection between your remote device and your home network. Think of it as building a private, invisible tunnel directly to your home. Once you're connected through the VPN, your remote device acts as if it's actually inside your home network, so you can access your Pi directly using its local IP address.
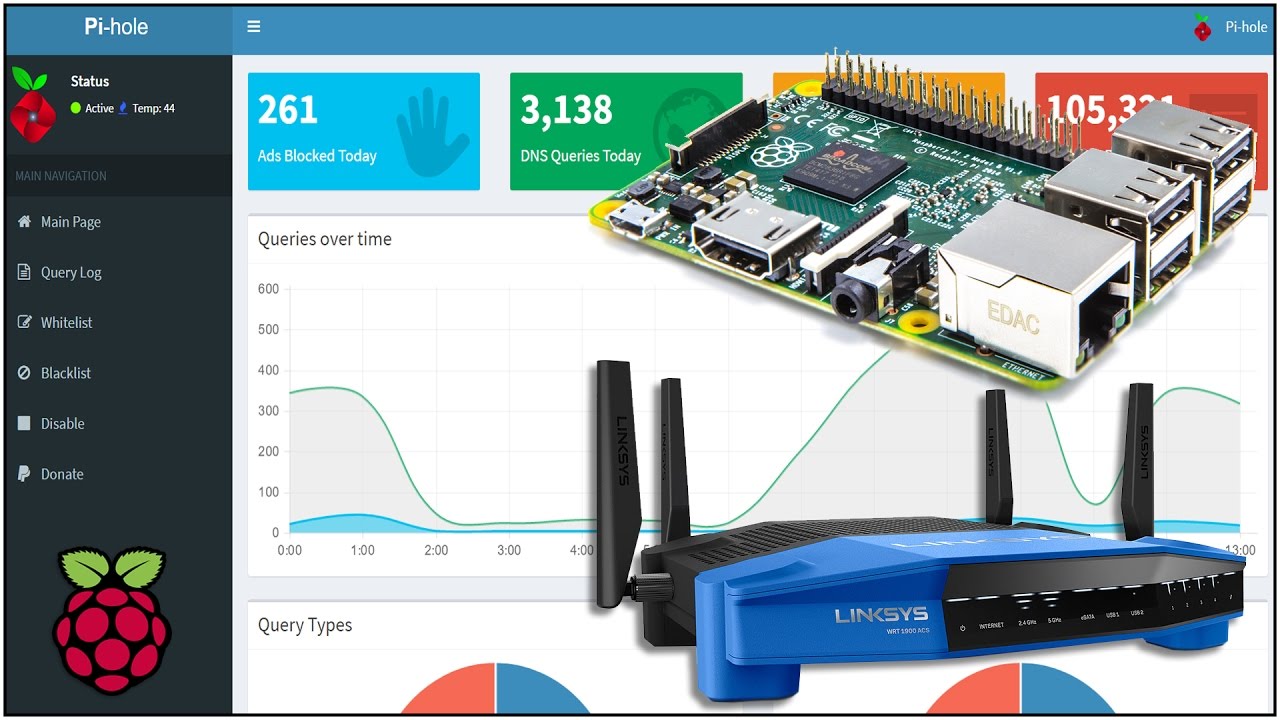
For a free VPN server on your Raspberry Pi, a popular choice is Pi-hole's WireGuard integration or OpenVPN. Setting up WireGuard on a Raspberry Pi is relatively straightforward and offers good performance. It creates a secure way to connect, and it's quite efficient, too.
You'll need to set up a dynamic DNS service if your home internet provider changes your public IP address often, but many free dynamic DNS providers are available. This ensures your VPN always knows where to find your home network, which is pretty handy. Once the VPN server is running on your Pi, you just install the client software on your phone or laptop, and you're good to go. This method is often considered one of the best for full network access.
SSH Tunneling: A Direct Line
SSH (Secure Shell) is a protocol often used for securely connecting to your Raspberry Pi's command line. You can also use SSH to create a "tunnel" for other services. This is a bit more advanced, but it's incredibly powerful and very secure, you know.
One way to do this without port forwarding is to use a reverse SSH tunnel. This involves your Raspberry Pi initiating an SSH connection outwards to a publicly accessible server (like a free tier VPS or even another Pi with a public IP). Once that connection is made, you can then connect to your Pi through that public server. It effectively punches a hole from the inside out, which is pretty clever.
This method requires a third-party server that you can SSH into, but there are many free or very low-cost cloud instances or old computers you might have lying around that could serve this purpose. It's a direct, secure way to get command-line access or even forward ports for web services running on your Pi, which is quite useful for many projects.
Cloud IoT Platforms (Free Tiers)
Several major cloud providers offer free tiers for their IoT platforms. These platforms are designed to let devices like your Raspberry Pi send data to the cloud and receive commands back. While they don't give you direct SSH access to your Pi, they are excellent for monitoring sensors or sending simple commands to actuators.
Platforms like Google Cloud IoT Core (which had a generous free tier, though its future is changing, so check current offerings), AWS IoT Core, or Azure IoT Hub often have free usage limits that are perfect for personal projects. Your Pi would run a small program that connects to the cloud platform, sending data or listening for instructions. This is great for building smart home dashboards or remote data logging, and it's surprisingly simple to get going, really.
The benefit here is that the cloud platform handles all the tricky networking for you. Your Pi just needs an internet connection to reach the cloud service, and the cloud service then acts as the go-between for your remote control. This is a very scalable option, too, if your project grows.
Reverse Proxies and Ngrok Alternatives (Free Tiers)
Services like Ngrok create a secure tunnel from your local network to the internet, giving your local web server or service a public URL. This is fantastic if you're running a web server on your Raspberry Pi (like for a home automation dashboard or a simple website) and want to make it accessible from anywhere.
Ngrok itself has a free tier that's quite useful for testing and personal use, though it might have limitations on connection time or concurrent tunnels. There are also open-source alternatives like frp (Fast Reverse Proxy) or Pagekite that you can host yourself on a public server, giving you more control and potentially more generous usage limits. This approach is very direct for exposing specific services.
These services work by having your Raspberry Pi initiate an outbound connection to their server. The server then acts as a public entry point, forwarding requests back through that established tunnel to your Pi. It's a neat way to bypass router restrictions without opening ports, and it's very effective for web-based applications, you know.
Remote Desktop Options (VNC, etc.)
If you need a graphical interface to your Raspberry Pi, like seeing its desktop, VNC (Virtual Network Computing) is a popular choice. Services like RealVNC Connect offer a free tier for personal use, which includes cloud connectivity. This means your Pi connects to their cloud service, and then you connect to the cloud service from your remote device to get a desktop view.
Other options include TeamViewer or AnyDesk, which also have free personal use tiers. These tools are designed for remote control and typically handle the networking challenges for you, making them quite easy to set up. You just install the client on your Pi and your remote device, and they connect through the service's servers. This is very user-friendly for those who prefer a visual way to interact with their Pi.
While not providing direct network access like a VPN, these remote desktop solutions are perfect for troubleshooting, running desktop applications, or interacting with your Pi's graphical environment. They are a good choice if you need to see what's happening on the screen, so they are, in some respects, the best for visual interaction.
Picking the Best Fit for Your Project
Choosing the best free remote access method for your Raspberry Pi depends on what you want to do with it. There's no single "best" answer for everyone, as "My text" implies, the best choice relates to "this purpose."
Security First, Always
No matter which method you pick, security should always be a top concern. Using strong, unique passwords is a must, and enabling SSH key authentication instead of password login is even better. Make sure any service you use is reputable and has a good track record for security. You don't want to open your home network to risks, after all.
Regularly updating your Raspberry Pi's operating system and any software you use for remote access is also super important. These updates often include security fixes that protect against newly discovered vulnerabilities. Staying current is a simple way to keep things safe, very simple.
Ease of Setup and Use
Some methods, like cloud IoT platforms or remote desktop services, are generally easier to set up, especially if you're not deeply familiar with networking. Others, like self-hosted VPNs or reverse SSH tunnels, might require a bit more command-line work and understanding. Consider your comfort level with technical tasks when making your choice. It's about finding what feels manageable for you, you know.
If you're just starting out, a service with a friendly interface might be the best way to begin. As you gain more experience, you can then explore more powerful, self-hosted options. The best way to learn is often by doing, after all.
Performance Considerations
Think about how responsive you need your connection to be. If you're just sending small bits of sensor data a few times a day, almost any method will work fine. If you need real-time video streaming or frequent, rapid control of devices, you'll want a solution that offers low latency and good bandwidth. VPNs and direct tunnels often provide better performance for heavy use cases, you see.
Free tiers of cloud services or tunneling services might have speed limits or data caps. Be sure to check these limits to ensure they meet your project's needs. Sometimes, a slightly less convenient setup can offer much better performance, which is worth considering for certain applications.
Keeping Your Remote Pi Safe and Sound
Once you've got your remote access working, it's really important to keep your Raspberry Pi and your home network secure. This means taking a few sensible steps to protect your setup. It's like locking your front door, you know?
Strong Passwords and SSH Keys
Always, always use strong, unique passwords for your Raspberry Pi. Don't use the default "raspberry" password! Even better, set up SSH key authentication and disable password login for SSH. SSH keys are much more secure than passwords, as they are nearly impossible to guess. This is arguably the best practice for securing SSH access.
Generating an SSH key pair involves creating a public key on your Pi and a private key on your remote computer. You store the public key on your Pi and keep the private key secure on your personal device. This way, only your specific device can connect, which is a very good thing.
Regular Updates
Make it a habit to regularly update your Raspberry Pi's operating system and all its installed software. You can do this with simple commands like `sudo apt update` and `sudo apt upgrade`. These updates often contain important security patches that fix vulnerabilities. Keeping things updated is one of the easiest and most effective ways to stay safe from new threats, so it's a good routine to get into, really.
Neglecting updates can leave your Pi open to known security holes, which someone with bad intentions might try to exploit. A well-maintained system is a secure system, and that's just a fact.
Limiting Access
Only open the ports or services that are absolutely necessary for your remote access method. If you're using a reverse proxy for a web server, don't also open ports for SSH directly to the internet unless it's strictly needed and very well secured. The less you expose, the less there is for someone to potentially attack. It's about minimizing your digital footprint, in a way.
Consider using a firewall on your Raspberry Pi (like `ufw`) to control incoming and outgoing connections. You can set rules to only allow connections from specific IP addresses or only to certain ports. This adds another layer of protection, making your setup much more resilient against unwanted access, which is something you definitely want, right?
FAQ
How can I access my Raspberry Pi from outside my home network without port forwarding?
You can use several free methods to access your Raspberry Pi without opening ports on your router. Options include setting up a VPN server on your Pi, using reverse SSH tunnels through a public server, or leveraging free tiers of cloud IoT platforms and tunneling services like Ngrok alternatives. These methods create an outbound connection from your Pi, bypassing the need for incoming port forwarding, which is quite clever.
Is it safe to expose my Raspberry Pi to the internet for remote access?
Exposing your Raspberry Pi directly to the internet without proper security measures is generally not a good idea, as it can make your device vulnerable. However, the methods discussed in this article, like VPNs, SSH tunnels, and cloud IoT platforms, are designed to create secure connections. Always use strong passwords, SSH keys, keep your system updated, and limit access to only what's necessary to keep things safe. Learn more about Raspberry Pi security on their official site, for instance.
What is the easiest free way to get a remote desktop on my Raspberry Pi?
For a graphical remote desktop experience, services like RealVNC Connect (with its free personal tier) are often considered the easiest. They handle the complex networking for you, allowing your Pi to connect to their cloud service, which you then access from your remote device. This means you don't have to deal with port forwarding or setting up your own VPN, making it quite user-friendly. You can also learn more about remote access options on our site.
- Remoteiot Device Ssh
- How Much Does Patience Wolfe Make
- Subhashree Sahu Viral Video
- Aditi Mistry Nipples
- Viralkandcom

Best Remote IoT Behind Router For Raspberry Pi: Unlocking Connectivity

Best Remote IoT Setup Behind Router With Raspberry Pi
How To Control Raspberry Pi Behind Router Iot Free Android A
