Getting Started With A Free Remote IoT Platform Raspberry Pi For Your Next Project
It feels pretty amazing, doesn't it, to build something smart, something that can talk to the internet, and control things from far away? Many folks dream of creating their own smart home gadgets or maybe even a system to keep an eye on their garden from anywhere. The Raspberry Pi, that small, yet rather mighty computer, is often the go-to device for such plans. It offers a lot of possibilities for anyone looking to get into the world of connected things.
However, one thing that often stops people is the thought of how much it might cost, or perhaps the idea that it's all too complicated. Finding a way to manage your Raspberry Pi projects remotely, and to see their data, usually involves some sort of online service. This is where the idea of a free remote IoT platform comes into play, offering a way to get started without needing to spend money on subscriptions or fancy equipment. It's truly a way to make your ideas happen without a big financial outlay.
So, if you are looking to connect your Raspberry Pi to the internet, watch its sensors, or even control a light from across town, you are in the right spot. This article explores how you can use a free remote IoT platform with your Raspberry Pi, giving you the tools to bring your connected projects to life without any cost. It's like getting something valuable without payment, a bit like when a company gives out promotional items, or like a complimentary service.
Table of Contents
- What Is a Free Remote IoT Platform Raspberry Pi?
- Popular Free Options for Your Raspberry Pi
- Getting Your Raspberry Pi Ready
- Connecting Your Pi to a Platform
- Project Ideas to Get You Started
- Common Questions About Free Remote IoT Platforms
- Wrapping Things Up
What Is a Free Remote IoT Platform Raspberry Pi?
A free remote IoT platform for your Raspberry Pi is, quite simply, a service or a set of tools that lets your Raspberry Pi send information and receive commands over the internet without you having to pay for it. It acts as a bridge, allowing your small computer to communicate with the wider world, and for you to interact with it from almost anywhere. This means you can monitor temperatures in your home, check on your plants, or even switch on a light, all from your phone or another computer.
These platforms usually give you a way to see your data in a clear, visual format, like graphs or charts, and often provide tools to set up alerts or automatic actions. It is a way to make your physical devices smarter, giving them a connection to the digital world. You might think of it as a complimentary service, given to you at no charge, to help you get started with your projects.
Why Go Free?
Choosing a free option for your IoT projects, especially when using a Raspberry Pi, has some clear advantages. For hobbyists or students, it removes a big barrier to entry, as you do not need to worry about recurring costs. This allows for a lot of experimentation and learning, without the pressure of a budget. You can try out different ideas, make mistakes, and learn from them, all without any financial risk.
For small-scale projects or proof-of-concept designs, a free tier often provides enough capacity to get things working and demonstrate your idea. It is like getting something "on the house," allowing you to test the waters before committing to anything larger. Many of these platforms also offer a straightforward way to upgrade if your needs grow, so you are not stuck with limited features forever.
Moreover, free platforms often have large, helpful communities. When you are just starting out, having access to others who are doing similar things, and who can answer questions, is incredibly valuable. This community support, which is also available without payment, can make the learning process much smoother and more enjoyable.
Understanding the Core Elements
When we talk about a free remote IoT platform, there are a few key parts that work together. First, there is your Raspberry Pi itself, which acts as the "brain" of your device. It gathers information from sensors, or perhaps controls actuators like motors or lights. Then, there is the internet connection, which lets your Pi talk to the outside world.
Next, you have the actual IoT platform. This is the online service that receives the data from your Pi, stores it, and makes it available for you to view. It also typically provides a way for you to send commands back to your Pi. Think of it as a central hub for all your connected devices. It handles the communication and data management, usually without you having to set up complex servers.
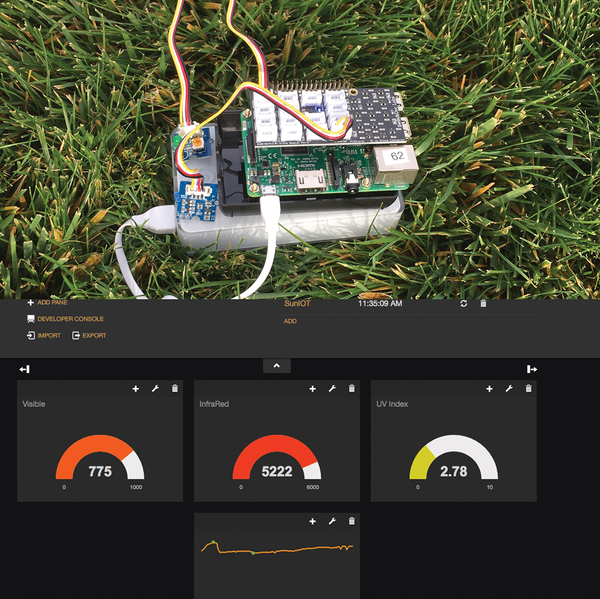
Finally, there is the dashboard or user interface. This is what you see on your computer or phone, showing you the data from your Pi in an easy-to-understand way. It might have buttons to control things, or graphs to show trends over time. These elements, working in concert, allow for effective remote management of your Raspberry Pi IoT projects, giving you quite a lot of control from a distance.
Popular Free Options for Your Raspberry Pi
There are several excellent platforms available that offer a free tier, allowing you to connect your Raspberry Pi and start building without any upfront cost. Each one has its own strengths, so choosing the right one often depends on what you plan to do. It is worth exploring a few to see which one feels most comfortable for your particular project.
ThingSpeak
ThingSpeak is a service from MathWorks, the company behind MATLAB. It is very good for collecting data from sensors and visualizing it. You can send data from your Raspberry Pi to ThingSpeak channels, and then create live graphs to see what is happening. It is particularly strong if you are interested in data analysis, as it integrates well with MATLAB for more advanced computations.
The free tier allows for a certain number of messages per day and channels, which is usually enough for personal projects or learning. It is a solid choice for monitoring environmental conditions, like temperature or humidity, or for tracking simple counts. Setting it up with a Raspberry Pi is fairly straightforward, using Python scripts to send information.
Adafruit IO
Adafruit IO is a very popular choice among makers and hobbyists, and for good reason. It is designed to be very user-friendly, with a clean interface and clear documentation. This platform lets you send and receive data, create interactive dashboards with sliders, buttons, and gauges, and even set up triggers to send emails or texts based on your data.
Their free tier is quite generous, allowing a good number of data points per minute and a decent amount of data storage. It is especially good if you are using Adafruit's own hardware, but it works perfectly well with any Raspberry Pi setup. Many people find its dashboard creation tools to be quite intuitive, making it easy to build a nice-looking interface for your project.
Ubidots (Free Tier)
Ubidots offers a free educational and hobbyist tier that is surprisingly powerful. It is known for its strong data visualization capabilities and its ability to handle different types of data. You can create custom dashboards, set up alerts, and even build simple logic rules directly within the platform. This makes it good for projects that need more than just data display.
The free plan has limits on the number of devices and data points, but for most personal projects, it provides ample room to experiment. It is a good option if you are looking for a platform that can grow with your project, offering more advanced features if you decide to move beyond the free tier later on.
Open-Source Alternatives (Self-Hosted)
If you are a bit more technically inclined and want complete control, you could consider self-hosting an open-source IoT platform on your Raspberry Pi itself, or on another always-on computer. Projects like Node-RED or Home Assistant offer incredible flexibility and are entirely free of charge, though they require more setup and maintenance on your part.
Node-RED is a visual programming tool that is excellent for connecting devices and services. You can run it directly on your Raspberry Pi and create complex flows for data processing and control. Home Assistant, on the other hand, is primarily focused on home automation, allowing you to integrate a vast array of smart devices, including your Raspberry Pi sensors, into one central system. These options are like getting a powerful tool without any payment, but you are responsible for keeping it running.
Getting Your Raspberry Pi Ready
Before you can connect your Raspberry Pi to any free remote IoT platform, you need to make sure it is set up properly. This involves a few basic steps to get the operating system running and ensure it can connect to the internet. It is a pretty straightforward process, but getting these initial things right will save you trouble later.
Basic Setup
First, you will need to install an operating system on your Raspberry Pi. Raspberry Pi OS (formerly Raspbian) is the most common choice, and it works very well. You can download the image from the official Raspberry Pi website and use a tool like Raspberry Pi Imager to put it onto a microSD card. Once that is done, put the card into your Pi, connect a power supply, and you should see it boot up.
After it starts, you will want to enable SSH (Secure Shell) if you plan to access your Pi remotely from your computer without a monitor. This can be done through the Raspberry Pi Configuration tool in the desktop environment, or by creating an empty file named 'ssh' in the boot partition of the SD card before you first boot it. This allows you to manage your Pi from your main computer, which is quite convenient.
Network Connections
For your Raspberry Pi to talk to an IoT platform, it needs to be connected to your network. This can be done via Wi-Fi or an Ethernet cable. If using Wi-Fi, you will configure it just like any other device, selecting your network and entering the password. A stable internet connection is very important for reliable IoT communication.
If your internet connection drops, your Pi will not be able to send data or receive commands. So, it is a good idea to ensure your Wi-Fi signal is strong where your Pi is located, or to use a wired connection if possible. This steady link is key for your remote setup to work effectively.
Security Considerations
When you connect any device to the internet, security is a big deal. For your Raspberry Pi, it is wise to change the default password immediately after setting it up. Also, keep your operating system and any installed software updated regularly. This helps protect your Pi from potential threats.
Be careful about what information you send to your IoT platform, especially if it is sensitive. While free platforms are great for learning, if you are dealing with very private data, you might want to consider more secure, perhaps paid, options down the line. For most hobby projects, though, being mindful of basic security practices is usually enough.
Connecting Your Pi to a Platform
Once your Raspberry Pi is ready, the next step is to connect it to your chosen free remote IoT platform. This usually involves writing a bit of code on your Pi that tells it how to communicate with the platform. The process can vary slightly depending on which platform you pick, but the general idea remains consistent.
Data Sending
The most common task for an IoT device is sending data. This might be temperature readings from a sensor, the state of a button, or even just a count of something. Most platforms provide libraries or examples in popular programming languages like Python that make this very simple. You will typically get an API key or a similar credential from the platform, which your Pi uses to identify itself and send data securely.
For instance, you might write a Python script that reads a temperature sensor every few minutes and then uses the platform's library to send that reading to a specific "channel" or "feed" on the IoT service. This data then appears on your dashboard, ready for you to view. It is a fundamental part of how these systems work, truly the backbone of data collection.
Remote Control
Beyond just sending data, many free IoT platforms also let you control things remotely. This means you can send commands from your dashboard back to your Raspberry Pi. For example, you could have a button on your online dashboard that, when pressed, tells your Raspberry Pi to turn an LED light on or off.
This usually works by your Raspberry Pi "listening" for messages from the platform. When a command comes in, your Pi executes a specific action. This two-way communication is what makes remote control possible and opens up a lot of exciting project possibilities, like controlling smart plugs or even robotic arms from a distance.
Dashboard Creation
After your Raspberry Pi is sending and receiving data, you will want a nice way to see and interact with it. This is where the dashboard comes in. Most free IoT platforms offer intuitive drag-and-drop interfaces to build your own custom dashboards. You can add widgets like gauges, charts, text displays, and buttons to create a personalized view of your project.
A well-designed dashboard makes your data easy to understand at a glance and provides a clear way to control your devices. It is the visual front-end of your IoT system, making the raw data much more accessible and useful. This part is often quite enjoyable, as you get to design how your project looks and feels to you.
Project Ideas to Get You Started
With a free remote IoT platform and your Raspberry Pi, there are so many things you can build. Here are a few ideas to spark your imagination and help you get started with practical applications. These projects can be a great way to learn and apply what you have picked up.
One common project is an environmental monitor. You can connect temperature, humidity, and air quality sensors to your Raspberry Pi. Then, send that data to your chosen free IoT platform. You can view the readings on a dashboard, and even set up alerts to notify you if, say, the temperature goes too high or too low in a room. This is a very practical use, giving you peace of mind.
Another idea is a smart plant watering system. Use a soil moisture sensor connected to your Pi. When the soil gets too dry, your Pi sends a message to the platform, and you can see it on your dashboard. You could even add a small pump connected to your Pi that you can activate remotely from the dashboard to water your plants. It is a clever way to keep your greenery happy, even when you are not home.
You might also consider building a simple home security monitor. Attach a motion sensor or a door/window contact sensor to your Raspberry Pi. When triggered, the Pi sends an alert to your IoT platform, which can then notify you via email or text message. This gives you a basic, yet effective, way to keep an eye on things when you are away.
For something a little different, how about a remote-controlled light switch? Connect a relay module to your Raspberry Pi, which can control a lamp or any other electrical appliance. Then, create a button on your IoT dashboard that, when pressed, toggles the light on or off. This is a very satisfying project, showing the immediate impact of your remote commands.
Finally, think about a data logger for something like your energy usage. If you have a way to measure electricity consumption (perhaps with a smart meter that has an API, or a current sensor), your Raspberry Pi could periodically send that data to the platform. You can then visualize your energy usage over time, helping you understand and perhaps reduce your consumption. These projects truly show what is possible when you get something like a free IoT platform that is without charge.
Common Questions About Free Remote IoT Platforms
People often have similar questions when they are just starting out with free remote IoT platforms and Raspberry Pi. Here are some of the most common ones, with some helpful answers to guide you along.
Can I use any Raspberry Pi model with these free platforms?
Yes, almost any Raspberry Pi model will work just fine with these free platforms. Whether you have an older Raspberry Pi 3, a newer Raspberry Pi 4, or even a smaller Zero W, they all have the necessary capabilities to connect to the internet and send data. The key is that they can run the operating system and connect to your network.
Are there any hidden costs or limitations with free IoT platforms?
While these platforms are truly free of charge, they do come with certain limitations, as you might expect. These usually involve things like the number of messages you can send per day, how much data you can store, or the number of devices you can connect. These limits are typically generous enough for personal projects and learning, but if your project grows very large, you might eventually need to consider a paid plan. It is a bit like getting a complimentary sample; it is great for trying it out, but for more extensive use, you might need to buy the full product.
How secure are these free IoT platforms?
Security is a big concern for any internet-connected system. Most reputable free IoT platforms use standard security measures to protect your data, such as encryption for data in transit and secure authentication methods. However, it is always a good idea to follow best practices on your Raspberry Pi, such as using strong passwords and keeping your software updated. While they offer a good level of security for general use, for highly sensitive applications, a professional, perhaps paid, solution might offer more specialized security features.
Wrapping Things Up
Exploring the world of IoT with a Raspberry Pi does not have to be an expensive undertaking. As we have seen, there are plenty of excellent free remote IoT platforms that provide all the tools you need to get your projects off the ground. These platforms offer a way to connect your devices, collect data, and even control things from a distance, all without any cost.
Whether you are looking to monitor your home, automate your garden, or simply learn more about connected technology, these complimentary services make it very accessible. They remove the financial barrier, allowing you to focus on the fun and learning of building something new. So, why not give it a try? Pick a platform, get your Raspberry Pi ready, and start bringing your smart ideas to life today.
You can learn more about Raspberry Pi projects on our site, and for a deeper look into specific platform features, you might want to link to this page IoT Platform Comparison. For more technical details on setting up your Raspberry Pi, a good resource is the official Raspberry Pi documentation, which is quite helpful and can be found on their website.
- Emily Compagno
- Wasmo Telegram Link 2025
- Aditi Mistry Nipples
- Pinay Scandal News 2024 Philippines
- Viralkamd

Free Remote Iot Platform For Raspberry Pi The Ultimate Guide Mastering Device Ssh On A

How To Master Raspberry Pi Remote Iot Free Download A Comprehensive Guide Ssh For Enhnced
Best Remote IoT Platform Free For Raspberry Pi: Your Ultimate Guide
