Remote IoT Platform Free Raspberry Pi: Your Guide To Connected Projects
Are you looking to connect your Raspberry Pi projects to the wider world without spending a lot of cash? It's a pretty common wish for many makers and hobbyists. Getting your small computer to send information or take commands from far away, you know, can feel a bit like magic. This whole idea of having a remote IoT platform, especially one that doesn't cost anything, is really appealing for anyone wanting to build cool, smart devices right from home.
There's a real joy in seeing your homemade sensor report temperature data to your phone while you're out, or being able to switch on a light at home from across town. A Raspberry Pi, being so versatile and affordable, is just perfect for these kinds of tasks. The challenge, perhaps, is finding the right tools that let you do all this without having to open your wallet.
This guide will show you how to set up your Raspberry Pi with a free remote IoT platform. We will talk about why this setup is so good, what options are out there, and how you can get your projects up and running. It's about making your creative ideas a real part of the connected world, you see, using tools that are readily available and won't break your budget.
Table of Contents
- Why Think About a Remote IoT Platform for Your Raspberry Pi?
- Picking the Right Free Platform for Your Pi
- Getting Your Raspberry Pi Ready for Remote Control
- Bringing Your Project to Life: Steps and Ideas
- Overcoming Common Hurdles with Free Platforms
- Frequently Asked Questions About Free Raspberry Pi IoT
- Conclusion
Why Think About a Remote IoT Platform for Your Raspberry Pi?
Using a remote IoT platform with your Raspberry Pi just makes sense for a lot of reasons. It opens up so many possibilities for what you can build and how you can interact with your creations. You can monitor things, control things, and even collect data from far away, which is pretty neat. It's about giving your projects a voice, sort of, so they can tell you what's going on or listen to your commands.
Making Things Accessible, Anyway
One of the biggest plus points of using a remote platform is that your projects become accessible from anywhere with an internet connection. This means your home automation system, for instance, isn't just limited to your living room. You could check on your plants from work, or turn on the heating before you even get home. It gives you a lot of freedom, you know, to interact with your devices no matter where you happen to be.
Saving Some Money, You Know
For many, the cost of specialized equipment or subscription services can be a real sticking point. That's why finding a remote IoT platform that's free is such a big deal. It means you can experiment and build without a hefty financial commitment. This is particularly good for students or hobbyists who are just getting started and want to try out ideas without a lot of risk, you see. It really helps to keep things affordable.
Learning and Trying Out Ideas
These free platforms also offer a wonderful chance to learn about how connected devices work. You get to understand data flow, communication protocols, and how to make your Raspberry Pi talk to the internet. It's a very hands-on way to pick up new skills. Plus, you can try out all sorts of project ideas without worrying about wasting money on a platform that might not fit your needs later on. It's a great way to explore, basically.
Picking the Right Free Platform for Your Pi
Choosing a free remote IoT platform for your Raspberry Pi can seem a bit much, given how many options are out there. Each one has its own way of doing things, and some might fit your project better than others. It's about finding one that feels right for what you want to achieve, you know, and that you find relatively simple to work with.
Understanding What You Need, Basically
Before you pick a platform, it helps to think about what your project needs. Are you just sending small bits of data, like temperature readings? Or do you need to control things, like turning lights on and off? Some platforms are better for simple data collection, while others offer more ways to control devices remotely. Consider how much data you expect to send, how often, and whether you need fancy dashboards to see your information. This helps narrow down your choices, you see.
Popular Free Options for Raspberry Pi
There are several good free options for connecting your Raspberry Pi to the internet for IoT projects. Each has its own strengths, and it's worth checking a few out to see what clicks for you. Here are a few that people often use:
Adafruit IO: This is a pretty user-friendly service, arguably, that lets you send and receive data. It's got nice dashboards for showing your information, and it's quite simple to get started with Python on your Raspberry Pi. They offer a free tier that's good for many hobby projects, you know, allowing a decent amount of data points.
ThingsBoard Community Edition: If you're looking for something a bit more powerful and you're comfortable with self-hosting, ThingsBoard is a strong contender. The community edition is free and open-source. It offers a lot of features for data collection, visualization, and device management. It might take a little more effort to set up on your Raspberry Pi, but it gives you a lot of control, basically.
Freeboard: This one is more about creating dashboards to visualize your data. While it doesn't handle the data storage itself, it's really good at pulling data from various sources (like an MQTT broker) and showing it in a clear, customizable way. It's a good choice if you already have a way to get your data and just need a nice display, you see.
Node-RED: This is a programming tool for wiring together hardware devices, APIs, and online services. It runs directly on your Raspberry Pi and provides a visual way to build flows for your IoT projects. It's not a cloud platform itself, but it can easily connect to cloud services or MQTT brokers to send and receive data. It's incredibly flexible, you know, for building custom logic.
MQTT Brokers (like Mosquitto): MQTT is a lightweight messaging protocol perfect for IoT. You can set up your own MQTT broker on your Raspberry Pi using something like Mosquitto, or use a free public broker. This lets your devices talk to each other and to a central point. It's a fundamental piece for many IoT setups, and very efficient for sending small messages, you see.
Getting Your Raspberry Pi Ready for Remote Control
Before your Raspberry Pi can start talking to a remote IoT platform, you need to get it set up properly. This involves a few key steps to make sure it's ready to connect and communicate. It's a bit like getting a new pet ready for its new home, you know, making sure it has everything it needs.
Setting Up Your Pi's Operating System
First things first, you'll need to install an operating system on your Raspberry Pi. Raspberry Pi OS (formerly Raspbian) is the most common choice, and it's a good one. You can use the Raspberry Pi Imager tool to easily put the OS onto an SD card. Make sure you enable SSH during the setup process; this lets you access your Pi from another computer without needing a monitor or keyboard directly connected, which is really handy for remote work, you know.
Connecting to the Internet
Your Raspberry Pi needs to be connected to the internet to talk to any remote platform. You can do this with an Ethernet cable plugged into your router, or by connecting to Wi-Fi. If you're using Wi-Fi, you'll need to configure it on your Pi. Once it's online, it can reach out to the free IoT platform you've chosen, sending and receiving information. This is a pretty important step, obviously, for anything connected.
Security Tips for Your Remote Setup, To Be Honest
When your Raspberry Pi is connected to the internet and accessible remotely, security becomes quite important. You don't want just anyone being able to mess with your devices or access your data. Here are a few things to keep in mind:
Change Default Passwords: The first thing you should always do is change the default username and password for your Raspberry Pi. This is a basic but very effective step, you know, to keep unwanted guests out.
Keep Software Updated: Regularly update your Raspberry Pi's operating system and any software you install. Updates often include security fixes that protect against new threats. It's a simple command to run, and it makes a big difference, you see.
Use Strong Passwords for Platforms: When you sign up for a free IoT platform, use a strong, unique password. Don't reuse passwords you use for other accounts. This is just good practice, basically, for all your online activities.
Limit Open Ports: If you're setting up your own server or broker on your Pi, only open the ports that are absolutely necessary. The fewer open doors, the less chance of someone getting in. This might be a bit more advanced, but it's worth looking into, you know, if you're hosting things yourself.
Bringing Your Project to Life: Steps and Ideas
Once your Raspberry Pi is ready and you've picked a free remote IoT platform, it's time to start building your actual project. This is where the fun really begins, as you get to see your ideas take shape and interact with the real world. It's quite rewarding, you know, to see your code make something happen.
Simple Steps to Get Going
Getting your first remote IoT project up and running usually follows a few straightforward steps:
Connect Your Sensors/Actuators: Attach whatever sensors (like temperature, humidity, light) or actuators (like relays for lights, motors) you plan to use to your Raspberry Pi's GPIO pins. Make sure you follow proper wiring diagrams to avoid damaging your Pi or components.
Install Necessary Libraries: Your Raspberry Pi will need specific software libraries to talk to your sensors or the chosen IoT platform. For example, if you're using Python, you might need to install libraries for your sensor or for communicating with MQTT or the platform's API.
Write Your Code: This is the heart of your project. You'll write a script (often in Python) that reads data from your sensors, processes it, and then sends it to your remote IoT platform. If you're controlling things, the script will also listen for commands from the platform and activate your actuators. It's where your logic lives, you know.
Configure the Platform: On the remote IoT platform's website, you'll set up your device, create dashboards, and define how you want to visualize or interact with your data. This usually involves creating "feeds" or "topics" where your Pi will send its information. This is where you make it pretty, you see.
Test and Refine: Run your code, check the platform to see if data is coming through correctly, and test any remote controls. You'll likely need to make small adjustments to your code or platform settings to get everything working just right. It's a process of trial and error, basically, but very satisfying when it works.
Project Ideas to Spark Your Creativity
With a free remote IoT platform and your Raspberry Pi, there are so many cool things you can build. Here are a few ideas to get your mind going:
Remote Home Monitoring: Build a system that checks the temperature, humidity, or even if a door is open or closed in your home. You could get alerts on your phone if something is out of the ordinary. It's a nice way to keep an eye on things, you know, even when you're not there.
Smart Plant Watering System: Use a soil moisture sensor to tell your Raspberry Pi when your plants need water. The Pi could then activate a small pump to water them automatically, and you could monitor the moisture levels from anywhere. This is a pretty popular project, you see, for those who love plants.
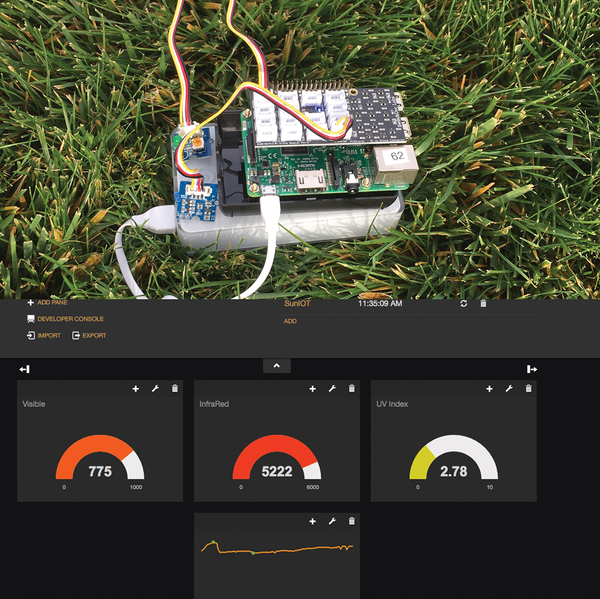
Personal Weather Station: Collect data like temperature, pressure, and humidity from your backyard. Send this data to your remote platform and create a dashboard to see your own local weather conditions. It's a simple yet very informative project, basically, that gives you real-time data.
Pet Feeder Control: Build a system that lets you dispense food for your pet remotely. You could trigger it from your phone, or even schedule feedings. This is quite useful, you know, for busy pet owners.
Overcoming Common Hurdles with Free Platforms
While free remote IoT platforms are fantastic for getting started, they sometimes come with a few limitations. Knowing what these might be can help you prepare and avoid frustration. It's like knowing the small print, you know, before you sign up for something.
Dealing with Data Limits, For Instance
Most free tiers of IoT platforms have limits on how much data you can send, how often, or how many devices you can connect. For small hobby projects, these limits are usually fine. But if your project starts sending a lot of data very frequently, or if you add many devices, you might hit these caps. You'll need to think about how to optimize your data sending, perhaps, or consider if a paid tier or self-hosting becomes a better option down the line. It's something to keep in mind, anyway, as your project grows.
Making Sure Things Stay Online
Keeping your Raspberry Pi and your internet connection stable is key for a reliable remote IoT setup. If your Wi-Fi drops, or your Pi freezes, your data won't get through. You might need to set up your Pi to automatically reboot if it loses connection, or use a watchdog timer to restart your script if it stops running. These steps help keep your project consistently online, you see, which is pretty important for monitoring or control.
When to Think About Paid Options, Perhaps
As your projects grow more complex, or if you decide to make something that needs to be super reliable for a longer time, you might find the free options start to feel a bit limiting. Paid tiers or commercial platforms often offer more features, better support, and higher reliability. This is when you might consider if the benefits of a paid service outweigh the cost. For example, if you're thinking about using a remote accounting service, reliability is quite important, you know, similar to how it is for a serious IoT setup. It's a natural progression, basically, as your needs change.
Frequently Asked Questions About Free Raspberry Pi IoT
Here are some common questions people ask about using free IoT platforms with Raspberry Pi:
What is the easiest free IoT platform for Raspberry Pi?
For many, Adafruit IO is often considered one of the simpler free IoT platforms to get started with on a Raspberry Pi. It has clear documentation and good support for Python, which is a common language for Pi projects. Node-RED, running directly on the Pi, is also very visual and can be quite easy for building logic, you know, once you get the hang of it.
Can I use Raspberry Pi as a free IoT gateway?
Yes, you absolutely can use a Raspberry Pi as a free IoT gateway. A gateway basically connects local devices (like sensors that might use Bluetooth or Zigbee) to the internet. Your Pi can collect data from these local devices and then send it to a remote IoT platform. It's a pretty common use case for the Pi, basically, acting as that bridge.
Are there any limitations to using free IoT platforms with Raspberry Pi?
There can be a few limitations, you see. Free platforms often have limits on the amount of data you can send, how many devices you can connect, or how often your data updates. They might also have fewer advanced features compared to paid versions. For personal projects, these limits are usually fine, but for bigger or more demanding applications, you might eventually need to look at paid options or self-hosting, perhaps.
Conclusion
Setting up a remote IoT platform with your Raspberry Pi, especially a free one, opens up a world of possibilities for your projects. It lets you connect your devices to the internet, allowing you to monitor and control them from anywhere. From keeping an eye on your home to automating your garden, the potential is vast. By choosing the right platform and following some simple setup steps, you can turn your creative ideas into real, working connected systems. This whole approach, you know, really makes advanced tech accessible to everyone. Learn more about connecting your projects on our site, and check out this page for initial setup tips.

Free Remote Iot Platform For Raspberry Pi The Ultimate Guide Mastering Device Ssh On A

How To Master Raspberry Pi Remote Iot Free Download A Comprehensive Guide Ssh For Enhnced
Best Remote IoT Platform Free For Raspberry Pi: Your Ultimate Guide
